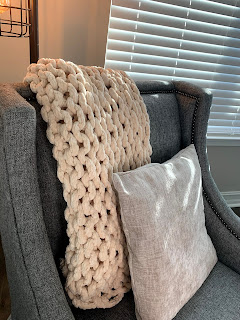
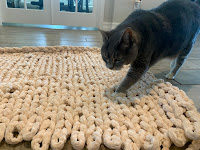
how to: hand-knitted chunky blanket
What can be more hygge than a big chunky knit blanket? A big chunky knit blanket that you can make yourself! When I like to set a hygge atmosphere, I for one like to be cozy. This comes at an especially good time for the area where it’s snowing. Even though the weather today where I live was 80 degrees Fahrenheit, I need to be under a blanket at all times. I just turn up the air-conditioning so I can be cozy, but not sweaty! Doing a craft or DIY project also has many hygge qualities itself. It allows you to be in the present and away from electronics, and focus on repetitive actions that turn out to be quite like a meditation. This is also a great way to spoil yourself or your loved ones. Below, I will show you step-by-step instructions, with pictures to guide you, on how to create your own hand-knitted chunky blanket.
Without further ado, grab yourself your favorite hot tea, light some candles, and let’s make some blankets!
What you will need
6-8 skeins of chunky yarn (I used Yard Bee Chunky Knit Velvet in Ivory. I get it at Hobby Lobby. Get it here. I like the velvet texture because it is unbelievable soft!. Be on the lookout for when these go on sale!)
Scissors
Optional: Needle and thread for extra security to finish off the edges or to connect pieces of yarn together. (I didn’t even use this)
Optional: Measuring tape to measure the size of loops. (I just eyeball it)
Work on a large flat surface to prevent the blanket from bunching up while working. I worked on the floor.
When I refer to the working string, it means the long string that has not been knitted through yet.
Steps
Step 1: Create a Slip Knot
Cross the beginning of the yarn over, resembling a cancer awareness ribbon, and pinch the bottom where the yarn meets the working string. Put your finger through the hole created and twist towards yourself to flip it over. Grab the loop with your thumb and pointer finger and pull it through.
Note: The size of the knot you create will be the size of the holes in the rest of the blanket. I like mine to be slightly bigger to get that chunky blanket effect.
Step 2: Create Your First Row |
Note: the length of this will be how wide your blanket is (the top of the blanket). I like an extra-wide blanket to wrap myself in!
Set your working string to the right. Then, pull it through the slip knot. Once again, pull the working string through the loop. Make sure the loops are the same size. Repeat this process until your chain is to your desired width.
Note: Keep your working string on the same side in the direction that you are creating your loops.
Step 3: Finishing the Other Rows
Move your working string to the left, since we will now be creating our loops moving in the left direction. Leave the end loop initially left on the end of the first row. Then, pull the working string under the bottom of the loop from the previous row on top, and pull through so that it’s facing downward. Repeat this process until you get to the end of the row. Then, move your workable yarn in the opposite direction and repeat this technique. Continue this process until you reach your desired blanket length (how long the blanket will be lengthwise).
Note: When you run out of your first skein of yarn, tie the end of the next yarn skein to the first by creating a knot. Then, cut off the excess to seamlessly incorporate the new string. You can also switch colors throughout by doing this process!
Step 4: Finish and Secure Your Blanket in Place
When you are done with the blanket, there will be some leftover working string. Leave this aside. Next, you will be intertwining the loops and crossing them over. Take the loop on the end, twist it, and pull the loop next to it through the loop. Repeat this step until all of the loops are connected at the end. It will resemble the top of the blanket.
On the side where we left the working string, you have some options.
Weave it through the side of the blanket to blend it in.
Cut some of the end off the working string and tie a knot on the corner of the blanket by looping it under and over the first loop.
Cut the string and fold it over so it looks like a loop. Then, sew against the yard it is placed over to secure in place.
Just like the side we left the working string on, the other side with the loop can be secured in the same fashion. You can stitch it to the blanket, but I like to tuck it in.
Step 5: Get Cozy
Your blanket is done. Cozy up with your tea and a good book. Enjoy!
P.S. You can make a really snuggly scarf by following these steps. Just make it shorter widthwise and longer lengthwise!


Love this!
ReplyDeleteYour aunt will love this.
ReplyDelete